Barkmann’s Corner
 |
Barkmann’s Corner
Cobra Battle Report 1
Our series of battle reports for Cobra are going to run through each of the three historical scenarios inside the book. The first of these is Barkmann’s Corner. During this battle Ernst Barkmann, in his Panther, with a little help from some SS-Panzergrenadiers, fought off an aggressive thrust from the tanks of the US 3rd Armored Division.
Casey and myself decided to re-fight this exciting encounter and see if we could get the same result. Casey took control of Barkmann and the SS-Panzergrenadiers, and I decided to attack with the Shermans.
Forces
German
Kampfgruppe Barkmann (Fearless Veteran)
|
|
SS-Unterscharfuhrer Ernst Barkmann
SS-Panzergrenadier Platoon (with two squads)
Note: Barkmann’s workshop is not available for this scenario.
American
Dog Company, 32nd Armored Regiment (Confident Trained)
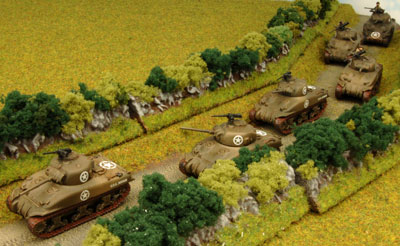
Company HQ (with two M4A1 Sherman tanks)
1st Tank Platoon (with 4 M4A1 Sherman tanks including Staff Sergeant Lafayette G Pool; Pool is rated Fearless Veteran)
2nd Tank Platoon (with 5 M4A1 Sherman tanks)
3rd Tank Platoon (with 5 M4A1 Sherman tanks)
|
 |
 |
 |
Set-up
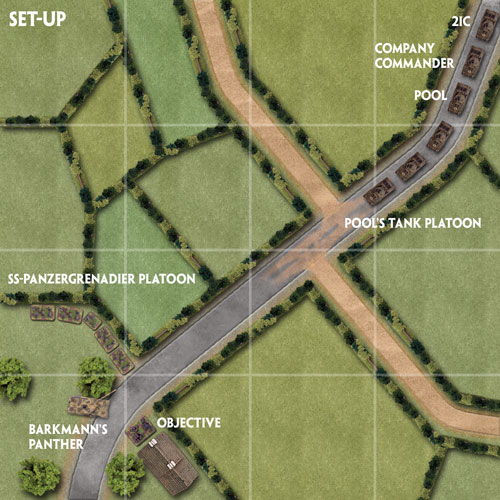
The game set-up was easy. We just followed the set-up guide for the scenario on pages 45-47 of Cobra.
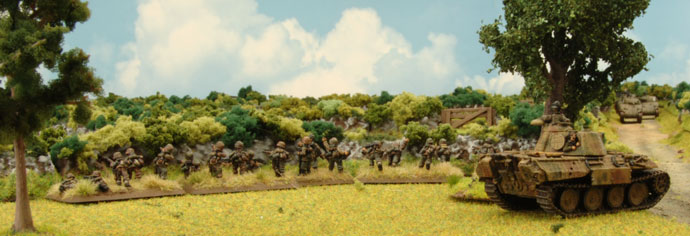
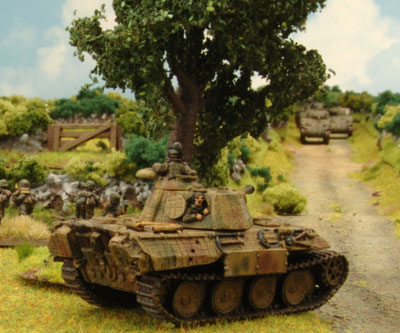
Casey placed Barkmann and the SS-Panzergrenadiers on the left of the road, opposite the objective. The SS-Panzergrenadier Platoon was placed up against the bocage. Barkmann was set up so the large tree on the left of the road concealed his tank. Barkmann’s Panther could see down the road and target anything coming down that way.
I followed the scenario set-up and placed the 1st Tank Platoon and the Tank Company headquarters on the road, with the three tanks of the first platoon leading, followed by Pool, with the HQ tanks bringing up the rear.
|
Turn 1
American
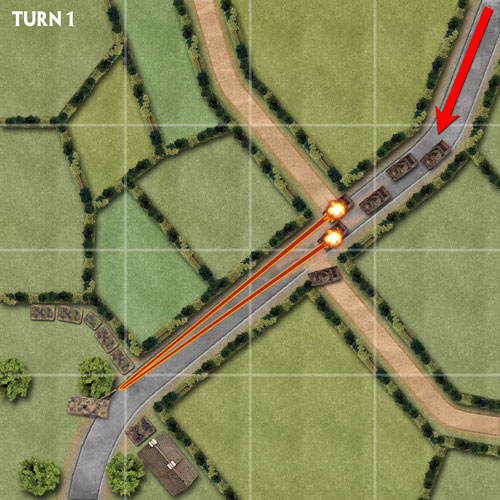
The American tankers got the first turn. I advanced my initial on-table tanks down the road towards the intersection. One tank had enough movement to make it on to one of the side roads and take cover behind the bocage. However, the other tanks of the 1st Tank Platoon faced the corner and Barkmann’s position. The headquarters tanks trailed behind, but were safe for the moment as they were out of range of the German tank ace’s Panther.
German
Casey decided there is no need to move any of his force. He had the Americans just where he wanted them. Barkmann took careful aim and fired a volley of shots at the lead Shermans on the intersection.
|
 |
 |
One of Barkmann’s special rules allowed Casey to
re-roll any misses, so he easily hit two tanks despite the long range.
The 7.5cm KwK42 is a very high-velocity gun with excellent armour
penetration, so even at long range the front armour of the Sherman tank
has no answer for it.
|
|
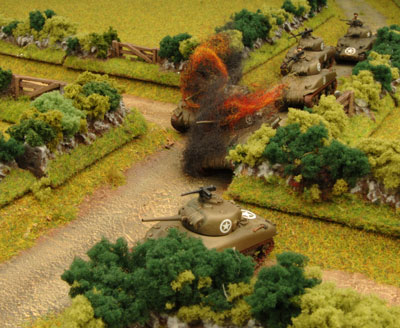
The anti-tank rounds cut through the armour like
a knife through butter. Both tanks were destroyed after Casey made the
Firepower tests.
Casey decided that Barkmann was in a good position and there was no need to move him with a Stormtrooper move.
|
Turn 2
American
When facing a tank ace like Barkmann, especially armed with an awesome weapon like the Panther, I expected no less from the first round of shooting. I took the road because ultimately it would be faster than trying to cross the bocage from the get-go. Though I was hoping Casey may only destroy one and bail out the other.
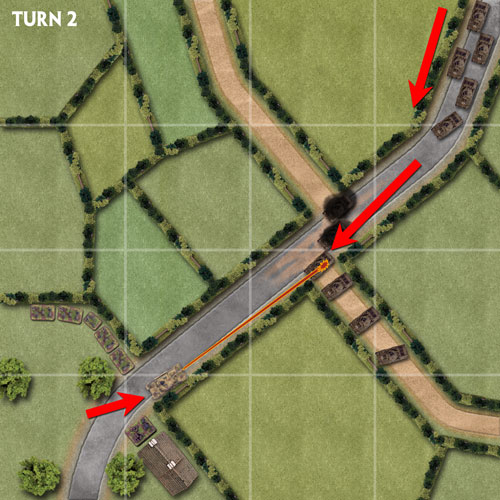
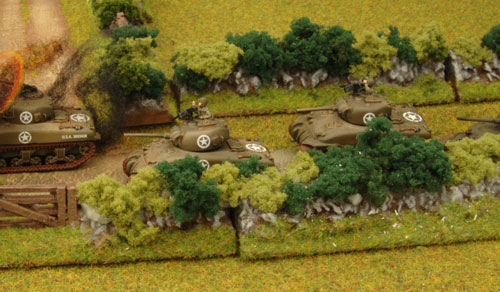
I moved Pool on to the side road with the command tank of the 1st Tank Platoon. The Company HQ followed them and they all took cover behind the bocage. The 2nd Tank Platoon also arrived on to the table via the road. They moved down the road towards the intersection.
I didn’t shoot because the M3 75mm guns of the Shermans can’t penetrate the armour of a Panther frontally.
|
 |
 |
Germans
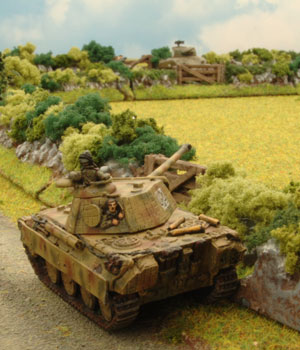
Casey decided to move Barkmann across the road and forward of the objective, so he could take a shot at the command Sherman of the 1st Tank Platoon positioned on the corner of the side road. The SS-Panzergrenadiers held their positions and went to ground.
Because Casey moved Barkmann, the tank ace only got one shot. The shot and the re-roll both missed.
|
|
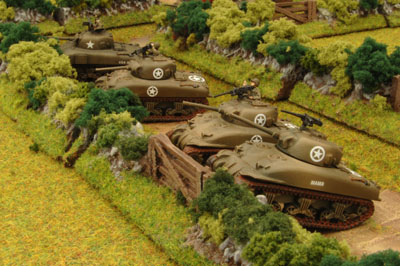
The commander of the American 1st Tank Platoon escaped to fight on. Casey decided that Barkmann didn’t need to do a Stormtrooper move, and he left the Panther in the new position.
|
 |
 |
Turn 3
American
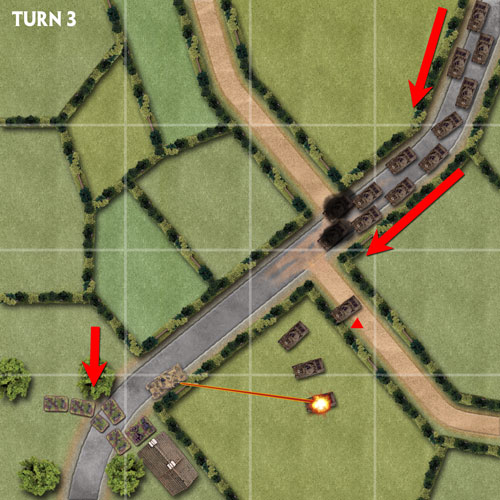
The third and last tank platoon arrived on the road behind the 2nd Tank Platoon. The 2nd Tank Platoon advanced up to the rear of the burnt-out tanks of the 1st Tank Platoon. The command and Pool’s tank of the 1st Tank Platoon crossed the bocage into the field to the right of Barkmann’s position. The Company HQ followed suit, but the Company Command Sherman bogged down on the bocage after failing its Skill test to cross it.
Barkmann still presented the front armour of his Panther, making it invulnerable to shooting from the M3 75mm armed Sherman tanks.
Pool was in striking distance of getting a side shot after moving next turn.
|
German
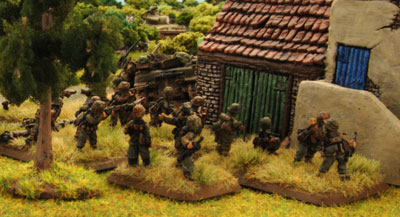
With the probe up the right by the American 1st Tank Platoon and the Company HQ, Casey decided to move his SS-Panzergrenadier Platoon across the road to cover the objective.
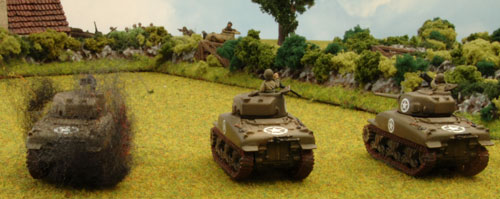
Barkmann remained stationary and fired on the 1st Tank Platoon, hitting the command tank.
|
|
|
The Panther’s gun made easy work of the Sherman
and the tank was destroyed. As part of the 1st Tank Platoon, this forced
Pool to make a motivation test because his platoon was under
half-strength. He passed, and because he had the added advantage of
being an independent team, he could continue to fight by himself.
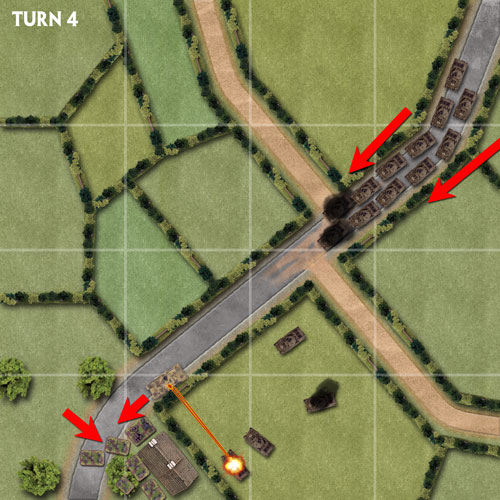
The SS-Panzergrenadier Platoon made a Skill test and Stormtrooper moved next to the objective. However, Barkmann was not so skilled and failed to Stormtrooper move backwards towards the objective and would be exposed to flank fire in the next turn.
|
 |
Turn 4
American
I was able to move Pool’s Sherman around the flank of Barkmann’s Panther, but there wasn’t quite enough space to get the 2iC Sherman around the flank.
The Company Command tank finally crossed the bocage and moved towards Barkmann’s position.
The 2nd and 3rd Tank platoons closed up on the road so they could cross the destroyed tanks on the intersection in the next turn.
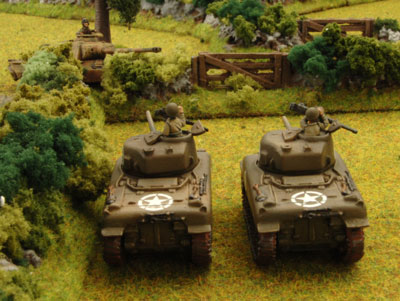
Pool fired two shots into the side of Barkmann’s tank. He was able to do this because of the stabiliser fitted to the Sherman tank; in addition, one of Pool’s special rules allows him to use his stabiliser to fire full ROF when moving without the normal +1 to-hit penalty.
|
|
Unfortunately I rolled two ‘3’s for my to-hit
rolls. Barkmann is a Veteran and was concealed behind the bocage, so I
needed a 5+ to hit him.
German
For his movement Casey completed the relocation of the SS-Panzergrenadiers so they were positioned behind the objective and farmhouse.
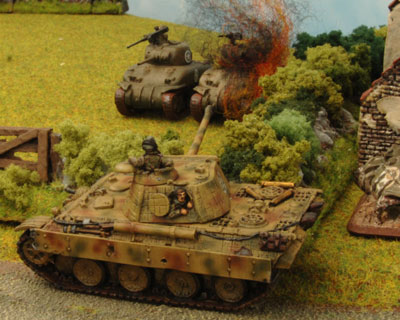
Casey turned Barkmann’s turret to face the unfortunate Pool. He then let fly a volley of shots at the under-protected Shermans of Pool and the 2iC. One shot hit and I took it on Pool’s Sherman, as I was confident that his special Warrior save would save him if the tank blew. Casey made the Firepower test and Pool’s tank
burst into flames.
|
|
|
|
Casey then rolled a die to see if Pool escaped to
the 2iC tank or was destroyed. Casey rolled a ‘4’ and Pool was
caught in the blast and didn’t escape. Maybe not such a good plan after
all.
Casey then made the Skill test to Stormtrooper move Barkmann’s tank in
the Assault step. He retired the tank back next to the objective and
covered Barkmann’s exposed flank.
Turn 5
American
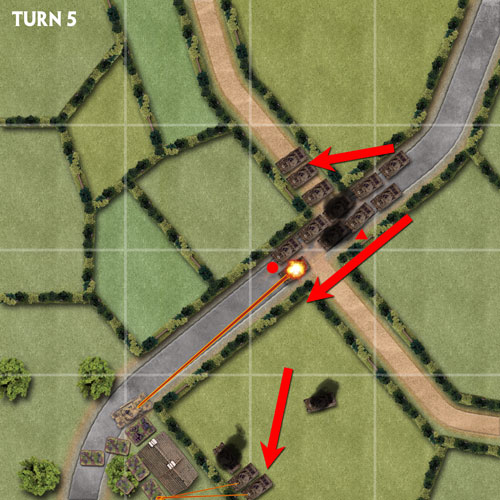
The 2nd Tank Platoon crossed three Sherman tanks across the wrecked tanks and straight down the road towards Barkmann and the objective.
|
|
The last two tanks of the platoon moved up behind the wrecked tanks to cross in the next turn.
The 3rd Tank Platoon also crossed three tanks over the wreckage at the intersection. These tanks moved on to the side road on the German left. They also left two tanks to cross in the next turn.
The Company HQ moved up to the bocage, where they could see the right flank of the SS-Panzergrenadiers. They fired at the SS-Panzergrenadiers and got two hits. Casey made the infantry’s saves.
German
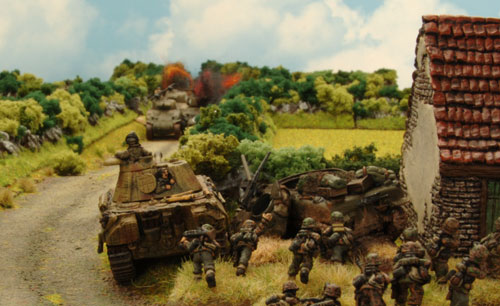
With the incoming fire from the American Company Command, Casey decided to have the SS-Panzergrenadier Platoon go-to-ground. Barkmann stood his ground facing the oncoming 2nd Tank Platoon.
|
|
|
|
Barkmann fired on the Shermans of the 2nd Tank Platoon advancing down the road. He scored two hits on the leading Shermans. One tank was destroyed and the platoon command Sherman was bailed out.
Casey decided Stormtrooper moves were unnecessary and Barkmann remained in his position.
|
|
Turn 6
American
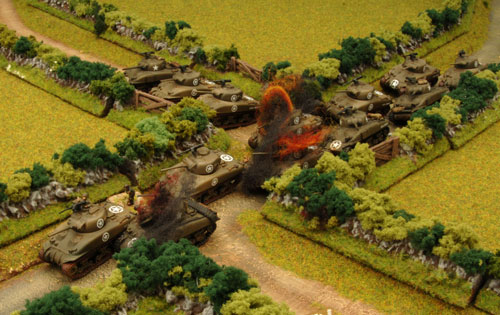
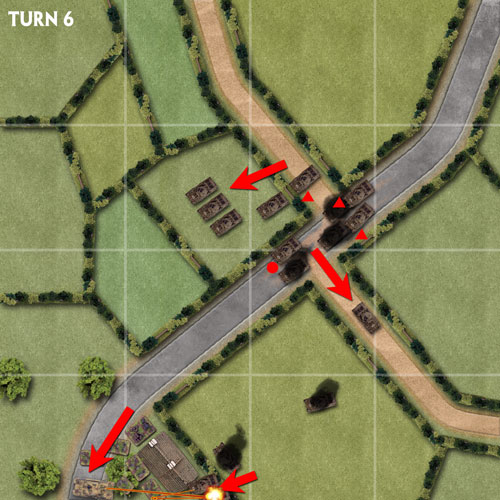
The 3rd Tank Platoon crossed three of its tanks over the bocage into a field. One Sherman from the platoon crossed the wrecked tanks and then moved through the gate near the intersection. The last tank from the platoon only had enough movement to cross the wrecked tanks and stopped at the gate.
The 2nd Tank Platoon’s command tank remained
bailed out.
|
|
|
|
The two trailing tanks of the platoon bogged down crossing
the wrecked tanks and the last operational tank headed up the side road.
The Company Command tanks crossed the bocage and fired their machine-guns at the SS-Panzergrenadier Platoon. The concealed and gone-to-ground Veteran infantry proved a hard target to hit (requiring a 6) and the tanks didn’t score a single hit.
German
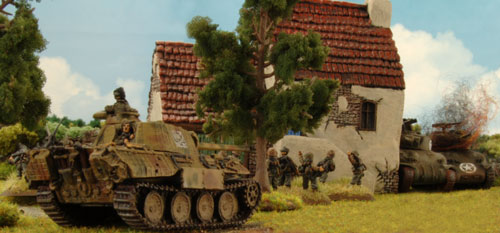
Casey moved Barkmann’s tank to the opposite side of the farmhouse to fire on the US Company HQ.
Barkmann fired on the flanking Americans and knocked out the Company Command Sherman tank. Because company command teams are Warriors, he had to roll a die to see whether the Company Commander has been killed.
|
|
On a 1-3 he would be OK and take over an adjacent
tank. On a 4-6 he would be killed and removed from the game. Casey rolled a
‘2’ and my Company Commander was saved and took over the 2iC Command
tank.
|
|
|
|
Turn 7
American
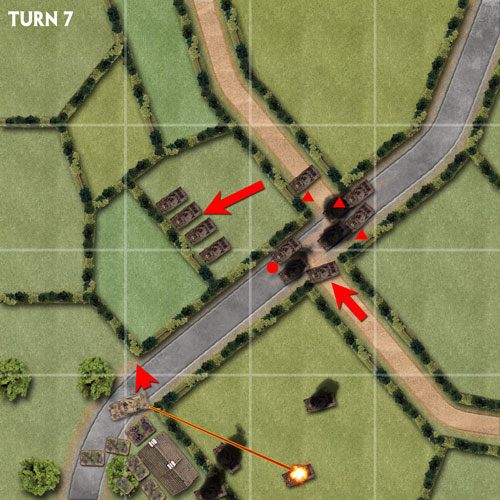
At the start of the turn, one of the bogged-down vehicles at the intersection unbogged, but this would prove to be short-lived.
The recently unbogged tank from 2nd Tank Platoon attempted to cross the wrecked tank again and immediately bogged down. The platoon command tank remained bailed out, so the one running tank on the side road returned to the intersection, but took cover behind the bocage on the corner.
The Company Commander, with his commandeered tank, moved back across the bocage and retreated into the field.
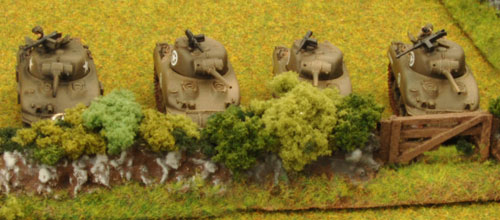
The 3rd Platoon moved four of its five tanks up
to the next line of bocage, ready to move across in the next turn.
|
|
The
last trailing tank still on the side road bogged down on the gate after
I managed to roll a ‘1’ on its bogging roll.
German
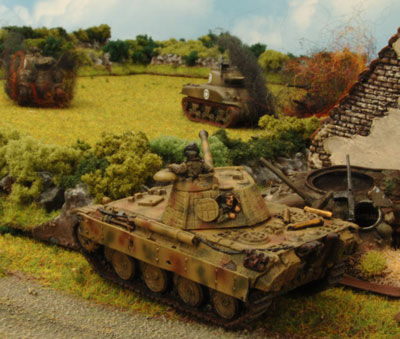
Casey moved Barkmann back to his position near the objective, where the tank could see the retreating American Company Command. The SS-Panzergrenadiers continued to keep low.
|
|
|
|
Barkmann fired at the Company Commander through the bocage. The shot hit and penetrated the Sherman’s feeble armour. This time it killed the Company Commander. With no other tank nearby to escape to, Casey didn’t even have to make a roll to see whether he was killed; the Company Commander was just removed from play.
Casey used Barkmann’s Stormtrooper move to straighten his hull and turret to face the forward threats.
Turn 8
Americans
With the company commander out of action, things would be a bit delicate for the rest of the battle.
|
I had already lost one platoon, so one more would push the company under half-strength, and without the Company Commander they would fail the test automatically.
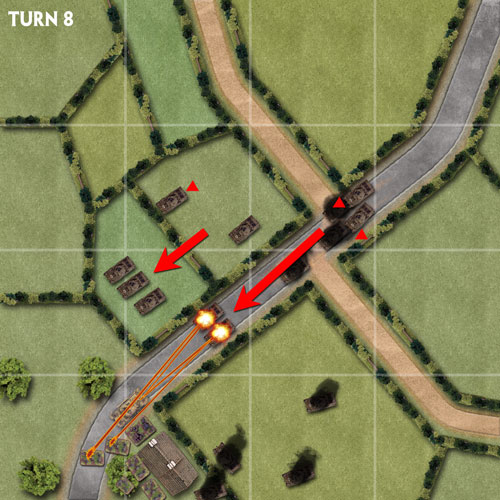
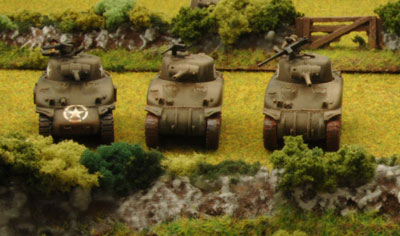
I un-bailed the command tank of the 2nd Tank Platoon and moved the two running tanks down the road towards Barkmann and the objective. The two bogged-down tanks remained stuck on the wrecked tanks.
The 3rd Tank Platoon crossed three tanks over the bocage, but a forth got stuck. The last tank of the platoon unbogged and crossed the gate to follow the trail left by the other tanks of the platoon.
The two tanks of the 2nd Tank Platoon fired on the SS- Panzergrenadiers behind Barkmann, but the German infantrymen were hard to hit, and the shooting had no effect.
|
|
|
|
|
|
German
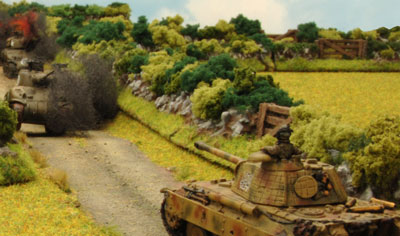
Barkmann was quick to respond to the Americans' rapid advance up the
road and fired a fast volley of anti-tank rounds towards them. Both
shots hit their mark and the two daring Sherman tanks were set ablaze.
This knocked out the platoon’s command tank, forcing the platoon below
half-strength. They took a platoon Motivation test at the end of the
Shooting step. I still had a bit of luck with me and the crews of the
bogged-down tanks at the intersection decided to stick around.
|
|
|
Turn 9
Americans
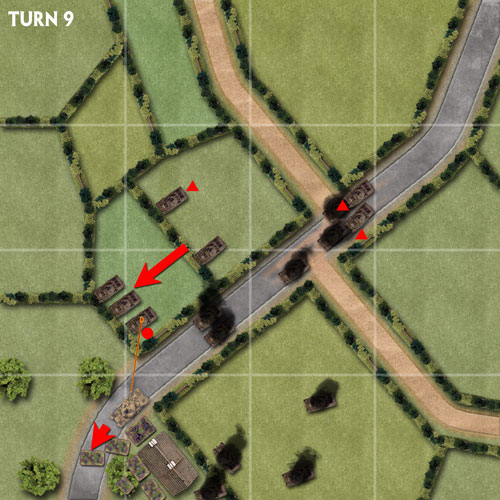
With a trail of burning wrecks strung up the road, my last, best hope now focused on the flanking tanks of the 3rd Tank Platoon.
The last two bogged-down tanks of the 2nd Tank Platoon failed to get moving and remained at the intersection, thought they could no longer move once unbogged because they had no platoon commander.
The 3rd Tank Platoon continued to advance and moved up to the next row of bocage. The trailing tank moved up to the gate a row of bocage back, and the bogged-down tank remained stuck on the bocage.
No immediate targets presented themselves, as Barkmann had only presented his front armour to the Shermans again.
|
Germans
Once again Casey saw no reason to move his troops and moved straight on to the Shooting step. He fired Barkmann’s Panther at the lead tanks of the 3rd Tank Platoon. However, even after the re-rolls, he only scored one hit. The shot went straight through the thin Sherman armour as usual, but the Firepower roll was unsuccessful and the Sherman was only bailed out.
To cover his flanks, Casey moved Barkmann’s Panther back behind the objective, around the corner of the road.
|
|
|
|
Turn 10
Americans
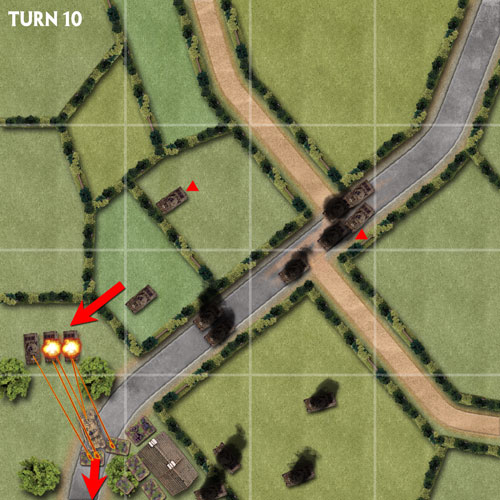
One of the 2nd Platoon tanks at the intersection finally unbogged, but couldn’t move due to the platoon’s lack of command. However, it could shot, but it proved to be just outside the side arc of Barkmann’s side armour.
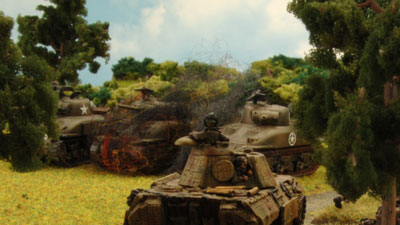
Three Shermans of the 3rd Tank Platoon crested the bocage and crossed into the field opposite the objective. The following Sherman moved through the gate and behind the other tanks. One tank was still bogged down on the bocage.
During the Shooting step the 3rd Platoon’s Shermans fired at the SS-Panzergrenadiers. They scored one hit, but the infantry saved.
|
German
With the American 3rd Tank Platoon so close to the objective, Casey decided the best move was to fire Barkmann’s Panther without moving, to take full advantage of his full ROF. Barkmann fired on the Shermans and destroyed two tanks, leaving just the command tank across the bocage. These casualties were not quite enough to push the 3rd Tank Platoon under half-strength.
Casey Stormtrooper moved Barkmann’s Panther to the edge of the table on the road and faced the tank toward the American Shermans.
|
|
|
|
Turn 11
American
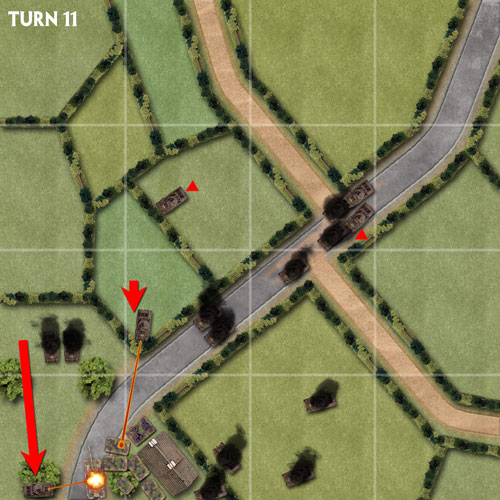
With so few working Sherman tanks on the battlefield, and the end-of-game deadline rapidly approaching, I needed to act decisively. I failed to unbog the trailing tank of the 3rd Tank Platoon, but I still had two operational.
I moved the command tank around the left flank of Barkmann’s Panther. The other tank I moved up to the corner of the bocage so it could fire on the SS-Panzergrenadiers guarding the objective.
The command tank had two flank shots, using its stabiliser, on Barkmann’s Panther. One shot hit (5+ require to hit versus a Veteran using a Stabiliser). Casey rolled a Armour Save versus the Sherman tank's M3 75mm gun and rolled a ‘3’.
|
| The Panther’s side armour is only 5, one of the
very few weaknesses of this tank, so the total score is only 8. The M3
75mm gun has an Anti-tank of 10 and therefore defeats the Panther’s
side armour. I roll a ‘4’ for the required 3+ Firepower test and
Barkmann’s tank was set ablaze. |
This scenario doesn’t utilise Barkmann’s workshop, so he can no longer take part in the battle.
The other Sherman tank fired its machine-guns at the SS-Panzergrenadiers, but only scored one hit, which the Germans easily saved.
German
Without Barkmann in the action, Casey had little choice other than to keep his SS-Panzergrenadiers gone-to-ground around the objective and weather anything I would throw against him in the next and final turn.
|
|
Turn 12
American
The American twelfth turn was the final turn of the game; if I didn’t take the objective in this turn, Casey’s Germans win.
I yet again failed to get the bogged down Shermans running, so I had only two Sherman tanks with which to take the objective.
I moved the command tank around the road to face the SS-Panzergrenadiers and the other Sherman crossed the bocage on to the road to join the platoon leader.
Both tanks fired machine-guns on the SS-Panzergrenadiers, but once again the Veteran gone-to-ground infantry proved hard to hit. One hit was scored and was easily saved.
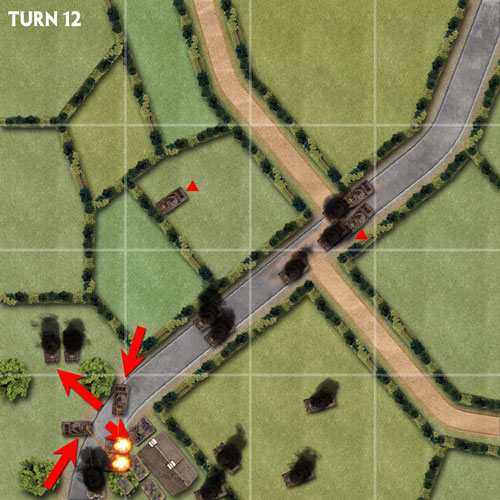
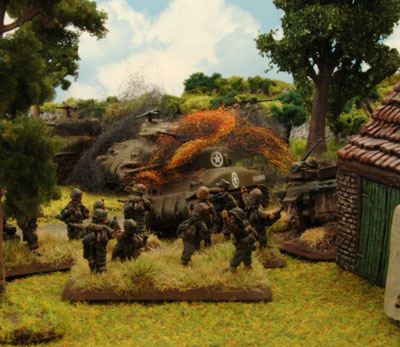
With nothing to lose, except the game, I sent the two working Sherman tanks of the 3rd Tank Platoon assaulting into the SS-Panzergrenadiers.
|
|
|
|
The Germans were not armed with any Panzerfausts, so I was at least safe from that. The tanks drove into the SS-Panzergrenadier Platoon’s position and destroyed two teams. The Fearless SS-Panzergrenadiers made their Motivation test and struck back. They got three hits and I made two armour saves, but I roll a ‘1’ for the last. One of my tanks was bailed out. I then failed my Motivation test to continue the fight. The command Sherman retreated back from the combat, leaving the bailed-out tank to be captured by the victorious SS-Panzergrenadiers.
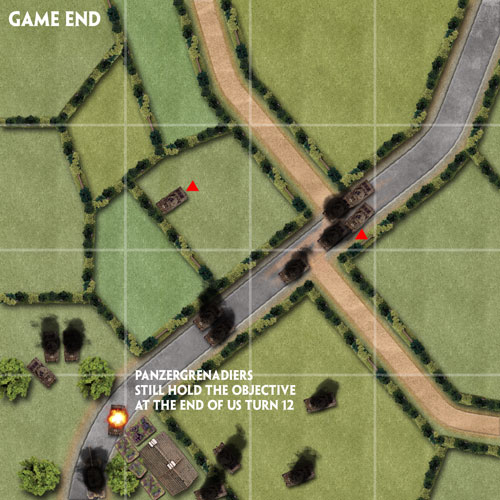
At the end of the turn I passed my Motivation test for the 3rd Tank Platoon being under half-strength, but it mattered little. The Casey’s Germans won the battle as I had failed to take the objective by the end of my turn 12.
|
|
End Game
Wayne using the Americans
At the end of the battle Barkmann had destroyed twelve of my sixteen tanks, two were bogged down, one was operational but leaderless, and the final tank sat tantalisingly close to the objective. One of my destroyed tanks was even the mighty Pool!
My score against Casey’s force consisted of just Barkmann’s Panther and two SS-Panzergrenadier MG teams in the final desperate assault.
A tricky mission. I almost had Barkmann in turn 4, but the dice were against me. However, that opportunity only arose after Casey failed Barkmann’s Stormtrooper roll. Another option I could have considered was sending the 1st Platoon and the Company HQ to the German left and the 2nd Platoon right.
|
|
|
This would have given the 1st Platoon two turns
more than the 3rd Platoon had to make the same manoeuvre. It would have
also put Pool and the HQ on this flank, making the attack six tanks
with special abilities, rather than just five normal tanks.
Didn't use smoke at the at all during the game, it might have helped, it might not have.
Wayne
Casey using the Germans
Wow, Barkmann in the bocage is hard. Being invincible from the front from the 75mm armed Shermans and having the terrain advantage is great. I think it was more a case of the terrain beat Wayne, not Barkmann. I was a little nervous when I failed the stormtrooper move in turn 3. I’m sure that if a few more bogging rolls went Wayne’s way I’d have been a lot more nervous towards the end of the game.
Casey
|
|
|